
You’re not alone if you’ve got water trapped in your ear. It’s a common problem that can be quite uncomfortable. Whether it’s from swimming, showering, or getting caught in the rain, it’s really annoying.
Don’t worry, we’ve got you covered. In this article, we’ll show you simple and effective ear drying techniques to get water out of your ear. You’ll learn about the causes, symptoms, and how to prevent it from happening again.
Key Takeaways
- Simple methods to remove water from your ear
- Effective ear drying techniques to prevent discomfort
- Causes and symptoms of water trapped in the ear
- Prevention strategies to avoid water entering your ear
- Safe practices for ear care
Understanding Water in the Ear
Ever felt water stuck in your ear and wondered how to get rid of it? Water in the ear is common, often after swimming or showering. Knowing why it happens and how the ear works is key to solving the problem.
Why Water Gets Trapped in the Ear Canal
The ear canal is narrow and can easily block, trapping water. This can occur from swimming, showering, or even during a cold or allergies. Water in the ear can be hard to remove, mainly if the canal is narrow or blocked by earwax.
Common Causes and Situations
Many situations can lead to water getting stuck in the ear. These include:
- Swimming or diving in pools, lakes, or oceans
- Showering or bathing
- Having a cold or allergies that cause nasal congestion
- Using earbuds or headphones that block the ear canal
The Anatomy of the Ear and Water Retention
The ear is complex, with parts that help us hear and balance. The ear canal is key for sound collection and direction. Its shape and size impact water entry and retention. Knowing the anatomy of the ear helps in prevention and finding the right remedy.
Signs and Symptoms of Water in Your Ear
Water in the ear can be uncomfortable. Knowing the signs helps you deal with it. You might feel mild discomfort or pain if water gets trapped. It’s important to tell the difference between water in the ear and an ear infection.
Immediate Sensations
When water enters your ear, you might feel fullness or pressure right away. You could also feel a tickling or itching inside your ear canal. Sometimes, the water can make your ear feel heavy or block your hearing.
Common immediate sensations include:
- Muffled hearing
- Feeling of water sloshing inside the ear
- Mild discomfort or pain
Distinguishing Between Water and Ear Infection
It’s important to know if the discomfort is from water or an ear infection. Water in the ear usually causes temporary discomfort. But an ear infection can lead to more serious symptoms. If you have persistent pain, fever, or discharge, it might be an infection.
| Symptoms | Water in Ear | Ear Infection |
|---|---|---|
| Pain Level | Mild to Moderate | Moderate to Severe |
| Duration | Temporary | Prolonged |
| Additional Symptoms | Muffled hearing, feeling of fullness | Fever, discharge, severe pain |
Potential Complications if Left Untreated
Leaving water in your ear for too long can cause problems. It might lead to an ear infection, like swimmer’s ear. This can be very uncomfortable and might need medical help. It’s important to keep your ears dry to avoid these issues.
To prevent water in ear, dry your ears well after swimming or bathing. Use earplugs or eardrops made for swimmers. If you think you have an ear infection, see a doctor for the right treatment.
Simple Gravity-Based Methods: How to Get Water Out of Your Ear
Gravity can help when you’re trying to get water out of your ear. Here are some easy techniques to try at home. Water trapped in your ear can be uncomfortable and might lead to infections. Luckily, you can use gravity to your advantage with simple methods.
Tilting and Jiggling Technique
One simple way to remove water from your ear is by tilting your head and jiggling your earlobe. Here’s how to do it:
- Tilt your head so the affected ear is facing downwards.
- Gently tug or jiggle the earlobe to help the water escape.
- You can also try moving your jaw or chewing to help dislodge the water.
This method is easy and often works well. By tilting your head, gravity helps pull the water out.
Creating a Vacuum with Your Palm
Another technique is to create a vacuum with your palm to suck out the water. Here’s how:
- Place your palm tightly over your ear, creating a seal.
- Press your palm against your ear and then quickly release. This creates a vacuum that can help draw out the water.
- Repeat this process a few times until you feel the water being pulled out.
Be gentle to avoid causing discomfort or pushing the water further in.
The Hopping Method
Hopping on one foot can help dislodge water from the ear for some people. To try this method:
- Stand on one foot, with the affected ear facing downwards.
- Hop gently on that foot while tilting your head to the side.
- You can also try shaking your head gently or jiggling your earlobe while hopping.
This method can be a bit more vigorous, so be cautious not to lose your balance.

These gravity-based methods are simple, effective, and can be done at home. If you continue to experience discomfort or if the water doesn’t drain, it may be wise to consult a healthcare professional for further guidance.
The Valsalva Maneuver and Chewing Techniques
The Valsalva maneuver and chewing techniques are simple ways to get water out of your ear. They change the air pressure in your ear or use jaw movements to remove water.
Performing the Valsalva Maneuver Safely
To do the Valsalva maneuver, gently blow air through your nose while pinching it. This balances the air pressure in your ears. Here’s how to do it safely:
- Pinch your nose shut with your fingers.
- Close your mouth.
- Gently blow air through your nose.
- You might feel a slight pressure change in your ear; this indicates that the maneuver is working.
Important: Don’t blow too hard, as it can hurt your eardrum.
Using Jaw Movements to Dislodge Water
Chewing can help get water out of your ear by moving your jaw. Try:
- Chewing gum vigorously.
- Moving your jaw from side to side.
- Yawning or making other exaggerated jaw movements.
Precautions and Limitations
While the Valsalva maneuver and chewing techniques are safe, remember these precautions:
- If you have a cold or sinus infection, the Valsalva maneuver might not be effective.
- Avoid using these techniques if you have a perforated eardrum or ear infection.
- If the water doesn’t dislodge after trying these methods, consider consulting a healthcare professional.
By knowing and using these techniques right, you can get water out of your ear. This helps avoid future problems.
Using Household Items for Water Removal
You can remove water from your ear using common household items. This method is easy and saves money because you likely have these items at home.
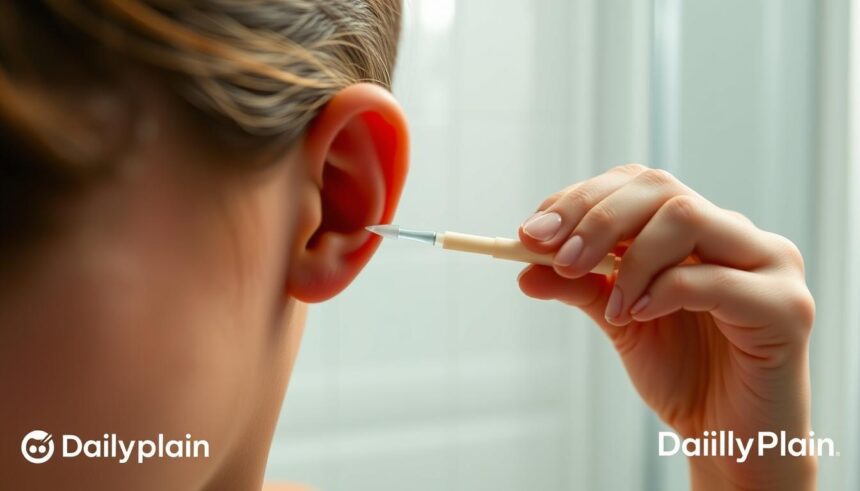
Cotton Swab Safety Warning
Be careful with cotton swabs when removing water from your ear. Avoid inserting the swab too deeply into your ear canal. This can push water further in or harm your eardrum. Instead, use the swab on the outer ear to soak up water.
Proper Use of a Soft Towel
A soft towel is great for removing water from your ear. After a bath or swim, gently tilt your head to the side. Then, use a soft, dry towel to dab the outer ear. This helps absorb water in the ear canal. But, don’t put the towel inside your ear.
Yawning and Swallowing Techniques
Yawning and swallowing can help get water out of your ear. Yawning opens the Eustachian tube, which connects your middle ear to the back of your nose and throat. Swallowing helps regulate air pressure in your ear, making water drain out.
Here’s a summary of the techniques and their effectiveness:
| Technique | Effectiveness | Precautions |
|---|---|---|
| Cotton Swab | Moderate | Avoid deep insertion |
| Soft Towel | High | Don’t insert into ear canal |
| Yawning/Swallowing | High | None |
Ear Drops and Solutions for Water Removal
Ear drops are a simple and effective way to dry out water in your ear. When water gets trapped, it can be uncomfortable and potentially lead to infections. Using the right ear drops can help alleviate this issue.

Over-the-Counter Drying Drops
Over-the-counter (OTC) drying drops are designed to dry out water in the ear canal. They contain ingredients like isopropyl alcohol or glycerin, which help evaporate water quickly. Always follow the instructions on the label carefully when using OTC drying drops.
“Using ear drops can be a game-changer for people who experience water in their ears frequently,” says Dr. Smith, an ENT specialist. “It’s a simple, non-invasive way to manage the issue.”
Homemade Alcohol and Vinegar Solution
A homemade solution of alcohol and vinegar can also dry out water in the ear. Mix equal parts of white vinegar and rubbing alcohol. Put a few drops into your ear. The acid in the vinegar breaks down debris, while the alcohol evaporates quickly, taking the water with it.
- Mix equal parts white vinegar and rubbing alcohol.
- Put 2-3 drops into the affected ear.
- Gently tilt your head to help the solution drain out.
Hydrogen Peroxide Method
Hydrogen peroxide is another solution for removing water from the ear. But, it’s important to use it correctly to avoid damage. Put a few drops of diluted hydrogen peroxide into your ear, and let it bubble and fizz. This can help loosen debris and dry out the water.
Be cautious and don’t push the liquid further into your ear canal. If you experience discomfort or pain, stop using the drops and consult a healthcare professional.
Heat Application Methods
Applying gentle heat can help dry out water in your ear, providing quick relief. Heat application is a simple yet effective technique for evaporating water trapped in the ear canal. You can use a blow dryer or a warm compress to dry out the water.
Using a Blow Dryer Safely
Using a blow dryer on a low setting can be an effective way to dry your ear. To do this safely, hold the dryer at least 6 inches away from your ear and set it to the lowest heat setting. Move the dryer back and forth to avoid concentrating the heat in one spot. This method helps to evaporate the water without causing damage to your ear.
Important Safety Tips:
- Never use a high heat setting, as it can cause burns.
- Keep the dryer at a safe distance to avoid direct heat exposure.
- Avoid using this method if you have an ear infection or if you’re unsure about the safety of using a blow dryer on your ear.
Warm Compress Technique
A warm compress can also be used to dry out water in your ear. To make a warm compress, soak a washcloth in warm water, wring it out, and apply it to your ear. The warmth from the compress can help to evaporate the water. You can also use a microwave-safe bag filled with rice or a warm washcloth heated in the microwave (ensure it’s not too hot).
Benefits of Warm Compress:
| Benefit | Description |
|---|---|
| Gentle Heat | Provides gentle heat that is comfortable and safe for the ear. |
| Easy to Make | A warm compress is simple to prepare using common household items. |
| Soothing | Can be soothing and comforting, if you’re experiencing discomfort due to water in your ear. |
As noted by health experts, “Applying heat can be a helpful way to dry out water in the ear.” This is a simple and effective method that can be done at home with the right precautions.
“The application of heat can facilitate the evaporation of water trapped in the ear canal, providing relief from discomfort.”
Ear Irrigation Techniques at Home
Ear irrigation is a safe way to remove water and debris from your ear at home. It’s great for after swimming or showering when water gets trapped.
Safe Tools and Equipment
To safely irrigate your ear, you’ll need a few tools. An ear irrigation kit or a bulb syringe is best. These tools help flush out your ear canal gently.
Don’t use sharp objects or insert things too far into your ear. This can hurt you or push water deeper.
Step-by-Step Process
Here’s how to irrigate your ear at home:
- Fill the bulb syringe with warm water.
- Tilt your head to the side, with the affected ear facing upwards.
- Gently squeeze the bulb syringe to release water into your ear canal.
- Allow the water to drain out by tilting your head to the other side.
- Repeat the process a few times until the water is cleared.
When to Avoid Irrigation
While ear irrigation is helpful, there are times to avoid it. If you have a perforated eardrum, an ear infection, or if you’re experiencing discharge or pain, see a doctor instead.
Potential Risks and Precautions
Ear irrigation is usually safe if done right. But, wrong tools or technique can cause problems like ear infections or damage to the eardrum. Always use gentle pressure and don’t force water into your ear.
By following these tips and being careful, you can safely use ear irrigation at home to remove water from your ear canal.
Prevention Strategies for Swimmers and Water Enthropists
Keeping water out of your ears is key for swimmers and water lovers. Taking the right steps can lower the chance of ear pain and infections.
Effective Ear Protection
Ear plugs are a top way to keep water out. You can pick from custom-made, silicone, or wax plugs. Custom-made ear plugs fit best, while silicone ear plugs are cheaper and reusable.
Look for ear plugs that are comfy, easy to see, and protect well. Make sure they fit right to block water.
| Type of Ear Plug | Comfort Level | Visibility | Protection Level |
|---|---|---|---|
| Custom-made | High | Low | High |
| Silicone | Medium | Medium | Medium |
| Wax | Low | High | Low |
Additional Protective Gear
A swim cap can also help keep water out. Swim caps are made from latex, silicone, or lycra. They don’t block water directly but reduce water flow around your head.
Ear bands or headbands can also help keep ear plugs in place or offer extra protection.
Post-Swimming Ear Care
After swimming, dry your ears well. Tilt your head and pull your earlobe gently. Use a dry towel or a hair dryer on a low setting to dry your ear canal.
Preventative Ear Drops
For those who swim often, preventative ear drops can help. These drops dry the ear canal and stop bacteria from growing.
By using these prevention tips, you can swim and enjoy water activities without ear discomfort.
Understanding and Preventing Swimmer’s Ear
It’s important to know the difference between water in the ear and swimmer’s ear. Water in the ear is common and can be fixed easily. But swimmer’s ear, or otitis externa, is a serious issue that needs care.
Difference Between Water in Ear and Swimmer’s Ear
Water in the ear happens when water gets trapped after swimming or bathing. Swimmer’s ear is an infection in the ear canal, caused by bacteria or fungi. The main difference is that swimmer’s ear has an infection, which can cause worse symptoms if not treated.
Risk Factors for Developing Otitis Externa
There are several factors that increase the risk of getting swimmer’s ear. These include:
- Frequent swimming or exposure to water
- Presence of skin conditions like eczema
- Using headphones or earbuds that can irritate the ear canal
- Having a narrow or hairy ear canal
- Using certain medical devices or hearing aids
Knowing these risk factors helps you take steps to prevent swimmer’s ear.
Preventative Measures for Frequent Swimmers
Here are some ways to prevent swimmer’s ear if you swim often:
| Preventative Measure | Description |
|---|---|
| Use earplugs | Custom-made or over-the-counter earplugs can help keep water out of your ears. |
| Dry your ears | After swimming, dry your ears thoroughly with a towel and consider using a blow dryer on a low setting. |
| Avoid scratching | Resist the urge to scratch your ears, as this can irritate the ear canal and increase the risk of infection. |
Early Treatment Options
If you get swimmer’s ear, treating it early is key to avoid worse problems. Treatment may include:
- Antibiotic or antifungal ear drops to combat the infection
- Pain relief medication to manage discomfort
- Avoiding swimming or getting water in the ear until the infection clears
Seeing a healthcare professional for the right diagnosis and treatment is vital for managing swimmer’s ear.
Special Considerations for Children and Elderly
Removing water from the ear can be tough, more so for kids and the elderly. They need gentle and safe ways to avoid more pain or problems.
Age-Appropriate Water Removal Techniques
For ear water removal in kids and the elderly, it’s key to use methods that work well and are gentle. Kids do best with non-invasive, easy-to-follow techniques. The elderly prefer methods that don’t need a lot of effort.
For kids, the tilting and jiggling technique is a good choice. They tilt their head and gently jiggle their earlobe. For the elderly, a warm compress can be very soothing and effective.
Helping Children with Water in Their Ears
Children often struggle to stay calm or know what to do when water gets in their ears. As a parent or caregiver, showing them the tilting technique can make it fun. You can also use ear drops made for kids to dry out their ear canal.
Being patient and reassuring is key. Sometimes, just having them yawn or swallow can help get the water out. If it doesn’t work, it’s best to see a healthcare professional.
Considerations for Elderly Individuals
Elderly people have more fragile ears and might have existing ear issues. It’s important to be careful. Using over-the-counter drying drops or a blow dryer on a low setting from a safe distance can work. But, always follow the instructions and don’t put anything in their ear canal.
When to Seek Help for Vulnerable Groups
If you or your child have ongoing discomfort, pain, or trouble hearing after trying to get water out, get medical help. For vulnerable groups, it’s safer to be cautious. Signs of infection, like redness, swelling, or discharge, also mean it’s time to see a doctor.
Knowing the right techniques and when to get help ensures safe and effective ear water removal for kids and the elderly in your care.
Conclusion
Now you know how to get water out of your ear. You can use simple methods or ear drying drops. These tools help you safely remove water from your ear.
If you love swimming or enjoy water activities, prevention is important. Using ear drying techniques regularly can help prevent water from getting trapped in your ear.
Knowing the causes and symptoms of water in your ear empowers you. Whether you’re dealing with water in your ear or want to prevent it, the methods in this article will help you solve this problem on your own.


