

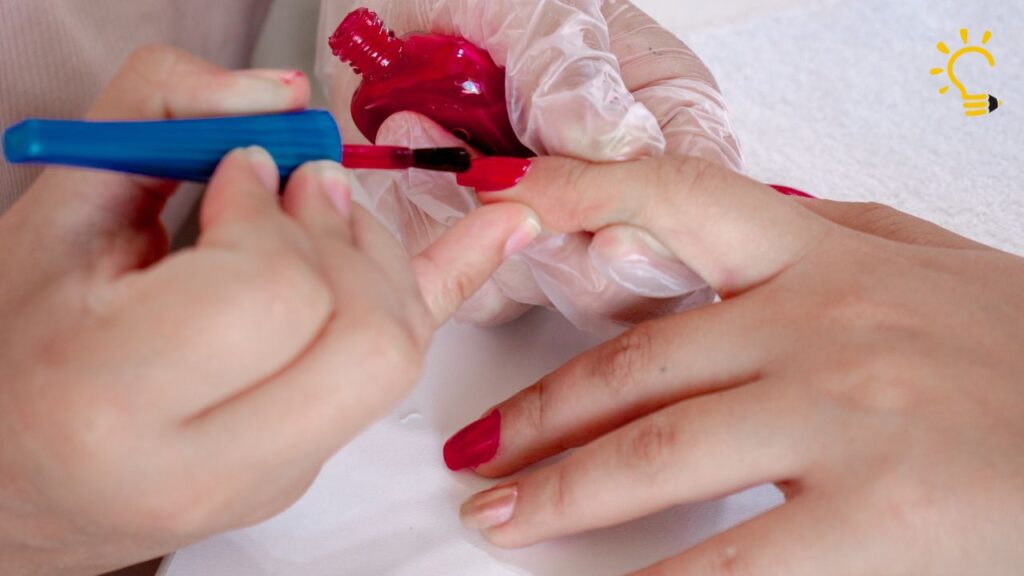
Did you know that learning how to remove gel nail polish properly could save you from damaging nails that take up to six months to grow back? Traditionally, removing gel nail polish at home takes 20-25 minutes for beginners, and many people make mistakes that harm their natural nails in the process.
However, with the right technique, you can safely remove gel polish in just 10 minutes. According to board-certified dermatologist Shari Lipner, MD, PhD, FAAD, acetone is the most effective way to remove gel nail polish at home. Fortunately, I’ve perfected a method that uses acetone-soaked cotton pads rather than full soaking, which helps prevent drying out the nail plate and surrounding skin. In this article, I’ll show you exactly how to take off gel nail polish at home using this quick, nail artist-approved technique that cuts your removal time in half while protecting your nails.
What You Need to Remove Gel Polish at Home
“The reason acetone is the preferred choice for removing gel is because it allows us to gently and effectively remove all of the gel from the nail plate.” — Hanna, Nail professional and beauty expert
Gathering the right supplies is crucial before you start to remove gel nail polish at home. Having everything prepared saves time and frustration during the removal process.
Acetone, cotton, and plastic wrap
The three absolute essentials for removing gel polish are:
- 100% pure acetone – Regular nail polish remover won’t work effectively for gel. Pure acetone is the most effective solvent that breaks down the gel formula quickly.
- Cotton balls or pads – Cut these to fit your nail size for targeted application. Cotton rounds absorb less acetone than cotton balls, making them more efficient for the soaking process.
- Plastic wrap or aluminum foil – Cut into small squares (approximately 3×3 inches) that can wrap around each fingertip. Plastic wrap creates a tighter seal than foil, preventing acetone from evaporating or dripping.
Optional tools for better results
In addition to the basics, these tools make the gel removal process smoother:
A nail file (180 grit) helps break the seal of the gel’s top coat first, allowing acetone to penetrate better. A cuticle pusher or orangewood stick is essential for gently scraping off softened gel without damaging your natural nail. Furthermore, a nail buffer smooths any remaining rough spots after removal.
For post-removal nail care, cuticle oil and moisturizer are extremely beneficial. These products combat the drying effects of acetone and keep your nails healthy between manicures.
Protecting your workspace and skin
Acetone is powerful enough to strip varnish or coatings from furniture surfaces. First of all, choose a well-ventilated area since acetone has a strong smell. Place plastic wrap over your work surface, then cover it with an old towel or paper towels.
Moreover, protecting your skin from acetone exposure is equally important. Apply petroleum jelly or cuticle oil around your nails before starting. This doesn’t affect the removal process but prevents the surrounding skin from becoming excessively dry during treatment.
For those concerned about acetone’s drying effects, some professionals recommend applying cuticle oil generously around the nail area. This creates a protective barrier that doesn’t inhibit the gel removal process but helps maintain skin hydration.

Step-by-Step: How to Remove Gel Nail Polish in 10 Minutes
Now that you’ve gathered your supplies, let’s walk through the process of removing gel nail polish safely at home without salon equipment.
1. File the top coat to break the seal
Initially, I grab a 180-grit nail file and gently buff the shiny top layer of each nail. This crucial first step breaks the seal that protects the gel polish, allowing acetone to penetrate effectively. I file lightly in one direction from cuticle to edge, moving left to right across each nail until the surface looks matte and slightly rough. Avoid filing too aggressively or using a back-and-forth motion as this can damage your natural nail.
2. Soak cotton in acetone and place on nails
Next, I cut cotton pads or tear cotton balls into pieces sized to fit each nail. The cotton should cover the entire nail but not touch the surrounding skin. I saturate each piece with pure acetone – about 5-10 drops per cotton piece is sufficient. The cotton should be damp but not dripping to prevent irritation to surrounding skin.
3. Wrap nails tightly with plastic or foil
Subsequently, I place the acetone-soaked cotton on each nail and wrap tightly with plastic wrap or aluminum foil. Many professionals prefer plastic wrap because it creates a tighter seal, preventing acetone from evaporating too quickly. I start with my non-dominant hand, securing each fingertip before moving to the next.
4. Wait 10 minutes for polish to soften
Once all nails are wrapped, I wait patiently for 10 minutes. During this time, the acetone penetrates through the filed top coat and breaks down the gel polish structure. The polish should begin to bubble, curl, or lift from the nail plate. Resist the urge to check progress early as this allows acetone to escape and slows the process.
5. Gently push off polish with a cuticle stick
After 10 minutes, I remove one wrap at a time. Using a wooden cuticle stick or pusher, I gently push the softened gel from cuticle to tip in one direction. The polish should slide off easily without scraping. If it resists, I rewrap that nail for another 5 minutes instead of forcing it off.
6. Wash hands and moisturize
Finally, I wash my hands thoroughly with mild soap to remove all acetone residue. Afterward, I apply cuticle oil generously to restore moisture to both nails and cuticles. This step is essential because acetone can severely dry out nails and surrounding skin.
Post-Removal Nail Care Tips
After completing the gel removal process, proper nail care is crucial for restoring health to your nails. The acetone used during removal dehydrates your nail plate, making aftercare essential for recovery and preparation for your next manicure.
Apply cuticle oil and hand cream
Following gel polish removal, hydration should be your top priority. Cuticle oil is particularly effective for repairing damage and restoring moisture to brittle nails. I apply oil not only to the nail itself but also massage it well into the cuticle area, which is where healthy new nail growth begins. For best results, use a small amount and massage in circular motions toward your hands.
Professional nail artists often recommend products like Dadi Oil by Famous Names, which repairs and moisturizes damaged nails without leaving greasy residue. CND Solar Oil and pure jojoba oil are also excellent options for deep hydration. I always follow cuticle oil with a rich hand cream to lock in moisture – this two-step approach creates a powerful hydration system that combats the drying effects of acetone.
Avoid reapplying gel immediately
Although your nails may look bare after removal, resist the temptation to immediately apply new gel polish. Nail technicians consistently notice improved nail strength when clients take breaks between gel applications. If you’re concerned about appearance during this break, consider using a simple nail strengthener or nourishing base coat instead of full gel application.
Let nails breathe for a few days
Contrary to popular belief, nails don’t actually “breathe” – they receive oxygen through the matrix from the bloodstream, not from air. Nevertheless, giving your nails a break from gel polish allows them to recover properly. Since natural nails grow approximately 1.2mm per week, recovery takes time.
During this break period, I recommend wearing gloves while doing dishes or gardening to prevent further damage. Also, consider using a non-acetone remover for any polish changes, as it’s less drying than pure acetone. Keeping hands consistently moisturized throughout the day significantly improves nail recovery – I keep hand cream beside every sink in my house as a reminder.
Mistakes to Avoid When Removing Gel Polish
“If you attempt to remove your gel in any other way, you will likely need to apply much more force, ultimately damaging the nail plate.” — Hanna, Nail professional and beauty expert
The way you remove gel polish matters just as much as how you apply it. Despite having the right tools, making these common mistakes can damage your natural nails for months.
Don’t peel or pick at the polish
That satisfying feeling of peeling off gel polish comes with serious consequences. When you peel off gel nail polish, you’re not just removing the polish—you’re ripping off layers of your natural nail plate as well. This damage makes nails thin, brittle, and prone to breaking. In fact, once this damage occurs, it can take weeks or even more than a month for your nails to recover their strength. The bond between your nail and the polish weakens with time, tempting you to peel, yet doing so starts a never-ending cycle of nail damage.
Avoid soaking nails in acetone baths
Dunking your fingers in a bowl of acetone might seem efficient, but it’s extremely harsh on your nails and skin. Soaking causes excessive dryness and can lead to nail splitting (onychoschizia) and white discoloration of the nails (pseudo-leukonychia). Specifically, acetone dehydrates the nail bed, cuticles, and surrounding skin, often resulting in redness, flaking, and irritation. Indeed, the damage we do to our nails comes not from the polish itself but from improper removal methods.
Don’t over-buff or file natural nails
Gentle buffing helps smooth ridges and remove gel residue, yet overdoing it thins the nail plate dramatically. Consequently, overly buffed nails become too flexible, causing future gel applications to separate easily from the nail bed. Even with a high-quality buffer, filing excessively removes the protective layers of your nails, making them weak and vulnerable. As a general rule, file in one direction only—never back and forth—to prevent splitting your nails. Regardless of how eager you are to remove all traces of gel, being too aggressive with filing does more harm than good in the long run.
Conclusion
Removing gel nail polish at home doesn’t have to be a nail-damaging ordeal. Above all, the 10-minute method I’ve shared protects your natural nails while saving you time and money compared to salon visits. The key elements—breaking the seal with gentle filing, using acetone-soaked cotton with a tight plastic wrap seal, and patiently waiting the full 10 minutes—work together to make removal both effective and safe.
Furthermore, what you do after removal significantly impacts nail health. Proper hydration with cuticle oil and hand cream helps combat acetone’s drying effects, while giving your nails a brief break between gel applications prevents long-term damage. Most importantly, avoiding the temptation to peel off gel polish preserves your natural nail layers, keeping them strong and healthy.
Remember, nail health is a marathon, not a sprint. Though the process might seem tedious at first, this method becomes second nature with practice. Eventually, you’ll cut your removal time while actually improving nail quality between manicures. The next time your gel polish starts chipping or growing out, resist the urge to pick or peel. Instead, set aside just 10 minutes to remove it properly. Your nails will certainly thank you for the extra care and attention you’ve given them.
FAQs
Q1. What’s the quickest way to remove gel nail polish at home? The fastest method is to file the top coat, apply acetone-soaked cotton to each nail, wrap tightly with plastic wrap, and wait 10 minutes. This technique allows for safe and effective removal without damaging your nails.
Q2. Can I use regular nail polish remover to take off gel polish? No, regular nail polish remover won’t work effectively. You need 100% pure acetone to break down the gel formula quickly. Using anything else may require more force and potentially damage your nails.
Q3. How can I protect my skin and nails during gel polish removal? Apply petroleum jelly or cuticle oil around your nails before starting the removal process. This creates a protective barrier that doesn’t interfere with removal but helps maintain skin hydration and prevents excessive dryness.
Q4. Is it okay to peel off gel nail polish? Absolutely not. Peeling off gel polish can severely damage your natural nails, making them thin, brittle, and prone to breaking. Always use the proper removal technique to avoid long-term nail damage.
Q5. How often should I take breaks between gel manicures? It’s recommended to give your nails a break for a few days between gel applications. This allows your nails to recover and helps maintain their strength. During breaks, use a nail strengthener or nourishing base coat to keep your nails healthy.


