
Tying a bow tie might look hard, but it’s easier than you think. It’s great for formal events or just to look sharp. Learning to tie a bow tie boosts your confidence and style.
- The Art and History of Bow Ties
- Types of Bow Ties You Should Know
- Essential Preparation Before Tying Your Bow Tie
- How to Tie a Bow Tie: The Complete Step-by-Step Process
- Best Bow Tie Tying Techniques and Tips
- Common Mistakes to Avoid When Tying a Bow Tie
- Visual Learning: Video Tutorials and Resources
- Styling Your Bow Tie for Different Occasions
- Conclusion: Mastering the Art of the Bow Tie
- FAQ
Our guide will show you how to tie a bow tie step by step. It’s simple to follow and practice. Soon, you’ll tie a bow tie like a pro.
Key Takeaways
- Learn the basic steps to tying a bow tie with ease.
- Understand the different types of bow ties and when to wear them.
- Practice with our step-by-step guide to build your confidence.
- Discover tips for adjusting your bow tie for a perfect fit.
- Master the art of tying a bow tie and elevate your formal wear.
The Art and History of Bow Ties

The bow tie has a rich history filled with interesting stories and significance. It has been a symbol of elegance for centuries. Its origins date back to the 17th century.
A Brief History of the Bow Tie
The bow tie’s story started during the Thirty Years War. Croatian mercenaries wore scarves to keep their shirts closed. This practical solution made its way to France, where it became a fashionable accessory.
By the 19th century, the bow tie was a key part of men’s formal wear, mainly for the upper class.
Over time, the bow tie has changed a lot, influenced by cultural and social shifts. Today, it’s a versatile accessory that can add personality to many outfits.
When to Wear a Bow Tie
So, when should you wear a bow tie? Traditionally, they’re for formal events like black-tie weddings, galas, and award shows. But, you can also wear one to add elegance to a casual gathering or business meeting.
The important thing is to think about the occasion and dress code. With practice, you’ll learn to tie a bow tie and make it part of your style.
Types of Bow Ties You Should Know

The world of bow ties is full of choices for every event and skill level. You don’t have to stick to just one type. Each has its own benefits.
Self-tie bow ties are the most authentic and flexible. They let you adjust the tie for a perfect fit. Learning to tie a self-tie bow tie can be tough but rewarding, giving you a unique look.
Self-Tie Bow Ties
Self-tie bow ties are the classic choice, needing you to tie it yourself. They offer the most flexibility in size and style. This makes them perfect for those who want a custom look. With practice, you can get a bow that matches your outfit perfectly.
Pre-Tied Bow Ties
Pre-tied bow ties are great for those who find tying hard or prefer ease. They come tied and can be adjusted to fit your neck. They’re perfect for long events because they save time and effort.
Clip-On Bow Ties
Clip-on bow ties are for those who can’t tie a bow tie. They clip onto your shirt, no tying needed. While not as authentic as self-tie, they’re easy and quick, ideal for beginners or quick events.
Knowing the different bow ties can help you choose the right one for you. Whether it’s the classic self-tie, the easy pre-tied, or the simple clip-on, there’s a bow tie for every need.
Essential Preparation Before Tying Your Bow Tie

Getting a bow tie right starts with preparation. Before you start tying, follow a few key steps. This will help you tie a bow tie smoothly and successfully.
Choosing the Right Bow Tie Material and Size
First, pick a bow tie that fits the event and your style. Silk is best for formal events. Cotton or wool works for less formal occasions. Make sure the bow tie fits your neck and body well. A bow tie that’s too big or too small is hard to tie and looks off.
- Think about the event and what you should wear.
- Pick a material that goes with your outfit.
- Make sure the bow tie fits your body right.
Setting Up Your Collar and Positioning
Then, get your collar ready by buttoning your shirt and adjusting it. The bow tie should fit snugly around your neck, with both ends even. Getting the bow tie in the right spot is key for a balanced look. Adjust the tie so it’s centered and the ends are even.
By doing these prep steps, you’re ready to learn how to tie a bow tie. Watching a bow tie tying video tutorial can also help you learn.
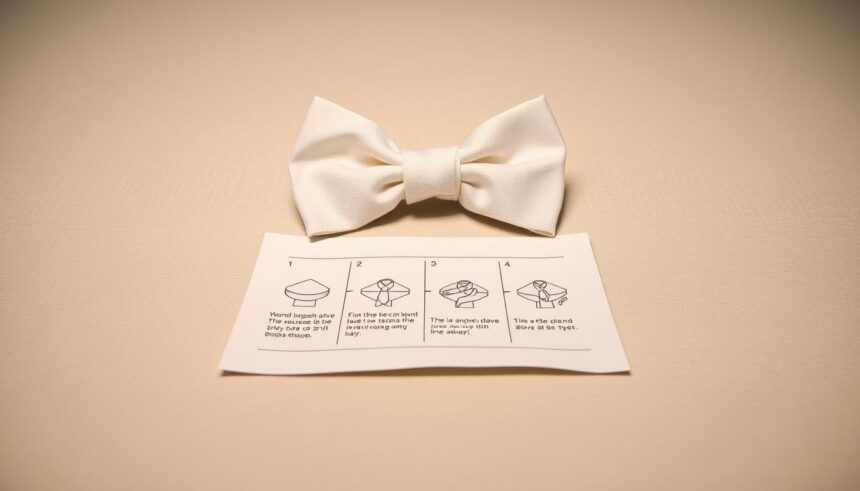
How to Tie a Bow Tie: The Complete Step-by-Step Process
Tying a bow tie is an art that needs patience and practice. Our step-by-step guide will help you master it quickly. Each step is important for a perfect bow tie.
Step 1: Position the Bow Tie Around Your Neck
Start by putting the bow tie around your neck. Make sure one end is lower than the other. The longer end should be on your left, and the shorter on your right.
Getting the Right Length
Adjust the bow tie so the longer end is 1.5 inches below the shorter end. This is key for a balanced look.
Proper Collar Placement
The bow tie should be centered and comfortable under your collar. It should not be too tight or too loose.
Step 2: Cross the Longer End Over the Shorter End
Cross the longer end over the shorter end to form an “X” shape. This is the start of your bow tie knot.
Creating the Base Knot
The “X” shape is the base of your knot. Hold it with your finger to keep the tension right.
Ensuring Proper Tension
The tension should not be too tight. This can make the bow tie misshapen. Adjust as needed.
Step 3: Form the Front Loop
Take the longer end and pass it under the shorter end. Then, bring it up and over the top to create a loop.
Positioning the Front Loop
The loop should be centered and the right size for your bow tie. Adjust it as needed.
Common Errors at This Stage
Be careful not to twist the bow tie or make the loop too small. This can ruin the look.
Step 4: Create the Bow Shape
Take the longer end and pass it through the loop you just made.
Folding Techniques
Fold the longer end back onto itself to shape the bow. This needs some skill.
Holding the Shape
Keep the bow shape in place with your fingers. This helps as you continue.
Step 5: Fold and Pull Through the Center
Fold the bow tie back onto itself and pass it through the center loop.
The Critical Fold
This step is key for a symmetrical bow tie. Make sure the fold is precise.
The Pull-Through Motion
Gently pull the bow tie through the loop to tighten it. Be careful not to pull too hard.
Step 6: Adjust and Perfect Your Bow Tie
Adjust the bow tie to make sure it’s centered and the edges are even.
Fine-Tuning the Shape
Make any final adjustments to the bow shape. Ensure it’s symmetrical and the edges are crisp.
Ensuring Symmetry
Check that both sides of the bow tie are even. Make adjustments as needed.
With these steps, tying a bow tie will become easy. Remember, practice makes perfect. Don’t get discouraged if it takes a few tries to get it right.
Best Bow Tie Tying Techniques and Tips
Tying a bow tie might seem hard at first, but with practice, you’ll get the hang of it. We’ve collected top tips and techniques to make learning fun and easy.
Practice Makes Perfect: Training Techniques
Regular practice is key to mastering the bow tie. Start slow and get faster as you get better. Try practicing with cloth or a necktie before using a real bow tie.
Break down the steps into smaller parts. Focus on one step at a time. This helps you understand and remember how to tie a bow tie.
Using a Mirror Effectively
A mirror is essential when learning to tie a bow tie. It lets you see what you’re doing and make changes. Place the mirror so you can see your neck and the bow tie clearly.
Practice in front of a mirror that shows you from different angles. This helps spot any problems with the bow tie’s shape or position.
Helpful Hand Positions
Your hand position affects how well you tie a bow tie. Keep your hands relaxed and use your fingers to handle the tie. Use one hand to hold the tie while the other ties it.
Try different hand positions to find what works best for you. Some people use their dominant hand for the tricky parts, while others prefer their non-dominant hand for support.
| Tip | Description | Benefit |
|---|---|---|
| Practice Regularly | Set aside time each day to practice tying a bow tie. | Improves muscle memory and speed. |
| Use a Mirror | Practice in front of a mirror to see what you’re doing. | Helps in aligning the tie correctly and identifying any issues. |
| Relax Your Hands | Keep your hands and fingers relaxed while tying. | Makes the process easier and less frustrating. |
Common Mistakes to Avoid When Tying a Bow Tie
Getting a bow tie right is all about knowing what to avoid. By spotting common errors, you can tie a perfect bow tie every time.
Uneven Bow Tie Ends
Uneven ends are a big mistake. To fix this, adjust the ends as you tie. Check in a mirror and tweak as needed.
Twisted or Bunched Fabric
Twisted fabric can mess up your bow tie. Keep the fabric flat while tying. Smooth out wrinkles to get a neat bow tie.
Incorrect Positioning on the Neck
Wrong placement can make your bow tie look bad. Place it right in the middle, under your collar. Adjust for a straight, even look.
By watching out for these mistakes, you can learn to tie a bow tie well. With practice, tying a bow tie will become second nature. You’ll look polished and professional every time.
Visual Learning: Video Tutorials and Resources
We’ve put together a list of top video tutorials and online tools for visual learners. Seeing the steps is key to mastering bow tie tying. With these resources, you’ll get better fast.
Recommended Video Tutorials for Bow Tie Tying
Video tutorials are great for learning to tie a bow tie. They show each step clearly. Look for ones with slow-motion and close-ups to grasp the details.
YouTube has many tutorials, from easy to hard. Find step-by-step bow tie tutorials that break it down into simple parts.
Apps and Online Tools for Bow Tie Mastery
There are also apps and online tools to help you tie a bow tie. They offer interactive guides, drills, and quizzes. Some apps let you watch tutorials on your phone, making practice easy.
Using these online tools for bow tie tying speeds up your learning. You’ll soon feel confident tying a bow tie.
Styling Your Bow Tie for Different Occasions
Whether you’re going to a formal gala or a casual get-together, your bow tie can be styled for the occasion. The secret to rocking a bow tie is knowing the event and dressing right. With the right bow tie tying technique, you can make your look pop at any event.
Formal Events and Black Tie Occasions
For black-tie weddings or galas, a classic black bow tie is perfect. It’s elegant and sophisticated. Wear it with a well-fitted tuxedo for a sharp look. Make sure your bow tie is tied well using a reliable bow tie tying technique.
Business and Semi-Formal Settings
In business or semi-formal settings, try different colors and patterns. A navy or burgundy bow tie can add personality to your outfit. For a calm look, go for a simple, self-tied bow tie in a soft color. Here, subtlety is key, and your bow tie should match your professional clothes.
Casual and Creative Bow Tie Styling
At casual events, get creative with your bow tie. Use bright colors, fun patterns, and textured bow ties to stand out. Wear a bold bow tie with a simple shirt and blazer for a cool, laid-back look. Feel free to try out different bow tie tying tips to create a unique style.
| Occasion | Bow Tie Style | Outfit Suggestion |
|---|---|---|
| Formal Events | Classic Black | Tuxedo |
| Business Settings | Navy or Burgundy | Professional Attire |
| Casual Gatherings | Bright Colors or Patterns | Simple Shirt and Blazer |
Conclusion: Mastering the Art of the Bow Tie
You’ve reached the end of our guide on tying a bow tie. Now, you should feel ready to tie a bow tie for any event. With some practice, you’ll get the hang of it and wear it proudly.
Remember, tying a bow tie takes patience and practice. It might take a few tries to get it right. But with each attempt, you’ll get better. Use our guide and video tutorials to improve your skills.
Now, it’s time to try out different bow tie styles for various events. A bow tie can make your outfit stand out, whether it’s for a formal event or just to add some flair to your work clothes. With our guide, you’re all set to impress at any occasion.
FAQ
What’s the best way to start learning how to tie a bow tie?
Start by practicing in front of a mirror. Begin with the basics of positioning the bow tie around your neck. Online resources, like video tutorials, can help you learn.
How long does it take to master tying a bow tie?
Mastering a bow tie takes different times for everyone. With regular practice, you can learn in about a week or two. Remember, it might take some time to get it right.
What’s the difference between a self-tie bow tie and a pre-tied bow tie?
A self-tie bow tie means you tie it yourself. It offers more flexibility and authenticity. A pre-tied bow tie is already tied and easy to attach to your shirt, making it convenient.
Can I wear a bow tie to a casual event?
Yes, you can wear a bow tie to casual events. Bow ties are not just for formal events. Choose a fun pattern or color and pair it with a relaxed outfit.
How do I choose the right bow tie material and size?
Consider the occasion, your style, and the material when choosing a bow tie. For formal events, silk or cotton is good. For casual, wool or knit works. Make sure it fits comfortably around your neck.
Are there any common mistakes to avoid when tying a bow tie?
Yes, avoid uneven ends, twisted fabric, and wrong neck positioning. Knowing these mistakes can help you tie a perfect bow tie.
Can I use online resources to learn how to tie a bow tie?
Absolutely, online resources like video tutorials, apps, and websites can help. They are great for learning and improving your bow tie skills.


